Go Back

Chewy toasted granola bars

I think granola bars are snacks that can either be healthy for you or quite the camouflaged junk food. They are the ones that I usually spend far too much time at the grocery store reading the side of the box; the ingredients, the nutritional content, just to find myself walking away empty handed. To say the least, I don’t trust them…ha!
Since totally pulling off a ’10 days of real food’ challenge about a month ago, I’ve really discovered a greater love for unprocessed foods. It was one of the most interesting food challenges that I’ve endeavoured yet and I’ve learned more than I can even write in one post. So, to ease my burden of finding the ‘right‘ granola bar in the shops, I just opted to make my own at home!
Prep Time 5 minutes
Cook Time 10 minutes
Total Time 15 minutes
Servings: 2 people
Course: Dessert
Cuisine: French
Calories: 520

Ingredients
  

  • 1/2 cup whole rolled oats
  • 1/2 cup whole kamut flakes
  • 1/2 cup slivered almonds
  • 1/2 cup raw sunflower seeds
  • 1/2 cup dried cranberries
  • 1/2 cup dried raisins
  • 1 1/2 cups Kashi puffed wheat cereal
  • 1/4 cup almond butter
  • 1/4 cup agave nectar
  • 1 tbsp cinnamon
  • 1/2 – 1 tbsp sea salt

Equipment

  • 1 oven

Method
 

  1. Preheat the oven to 350 F.
  2. On a parchment lined baking sheet, toast the first 4 ingredients.
  3. Toast them separately as they have different burning points.
  4. Ovens vary slightly, so just pop them in and watch them.
  5. They should take about 5-10 minutes each.
  6. Once all toasted, combine these 4 ingredients in one large bowl.
  7. Add the cranberries, and puffed wheat cereal and mix well.
  8. In a small saucepan, combine almond butter with agave nectar.
  9. Heat slowly over medium-low heat until melted.
  10. Ensure not to boil the mixture, so this takes only a few minutes.
  11. Stir in the cinnamon and sea salt and blend well.
  12. Pour melted mixture over granola and stir until well coated.
  13. Again, I used 2 bread loaf pans and greased them ever-so-lightly with butter (so they wouldn’t stick).
  14. Divide the mixture in two and press firmly into pans.
  15. Use a flat spatula, it seems to work best.
  16. Chill in refrigerator for at least 2 hours.
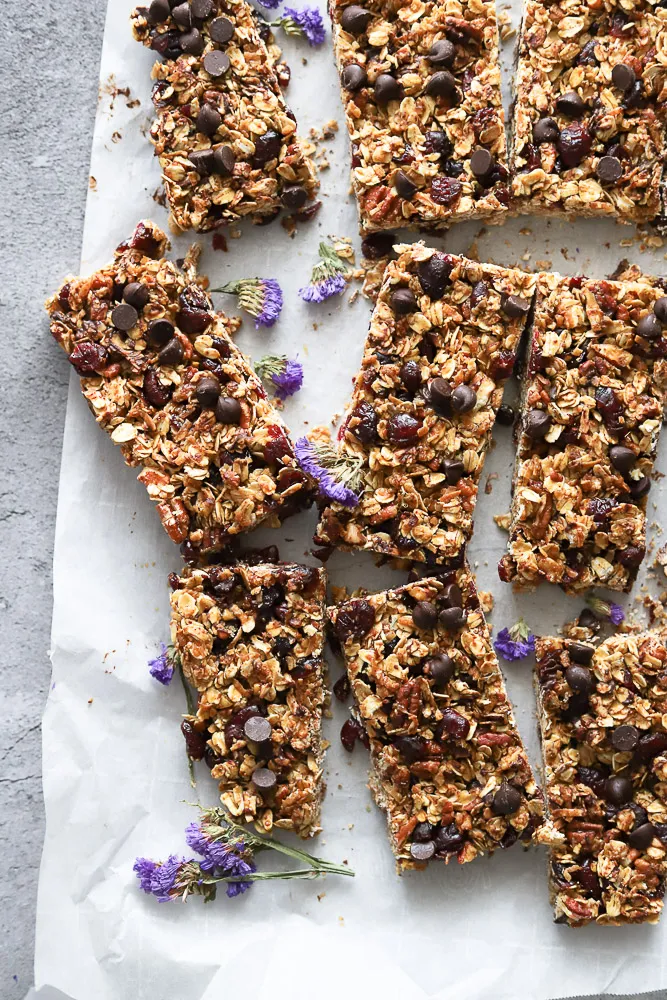
  17. Once cooled, remove from pan and slice into bars.
  18. Here’s where the loaf pans come in handy, since they’re the perfect width to create the length of the bars.
  19. Since these aren’t baked, they are very chewy and crumbly.
  20. My favourite!! Store in refrigerator so they don’t get too melty in the hot summer weather.

Video